Depositing Data
Upon logging into FRDR, you are presented with the Data Publication Dashboard. It shows the status of your dataset submissions: In Progress; In Curation; Under Embargo and Published. For those datasets that are In Progress, you have the options to Edit or Delete the dataset. Those datasets that have been Submitted are waiting for curation. Those that are Complete have been accepted into FRDR and are discoverable through search. A new submission can be initiated at any time.
Steps involved in submitting a dataset to FRDR:
- Selecting a storage group
- Select a data publication license
- Add Collaborators to contribute to submission
- Enter metadata for your data
- Specify if External Review is needed
- Specify an embargo period (if appropriate)
- Transfer dataset to FRDR
- Review and finalize the submission
You can stop the submission process, save your work, and resume your submission at any time. A Digital Object Identifier (DOI) is assigned as soon as you start a dataset deposit. The DOIs for all in-progress deposits will be shown in your list of incomplete deposits. This will enable you to share a DOI for your dataset with a funder or publisher immediately. Please note that the links for the DOIs will not work until after a data deposit is approved by a curator. Once submitted, you will not be able to make changes to the data or metadata. Any change to data or metadata after submitting will need to be done by contacting a curator at curators@frdr-dfdr.ca.
Selecting a Storage Group
Datasets in FRDR are organized in collections, known as Storage Groups. There are two types of Storage Groups: the Default Storage Group and Special Storage Groups. The default group, General / Général, will be preselected upon initiating a data deposit.
Special Storage Groups allow institutions, research groups, or special projects to create a collection for their datasets in FRDR. Each Special Storage Group will appear as a repository in the list of Canadian Research Data Repositories indexed by FRDR. Special Storage Groups may be able to use a personalized deposit template which could, for example, pre-fill metadata elements or make use of additional metadata fields other than the default Dublin Core/DataCite elements. The option to deposit to Special Storage Groups will be limited to authorized users. If you would like a Special Storage Group, or believe you should have access to an existing Special Storage Group, please contact support@frdr-dfdr.ca.
Data usage licenses
Users submitting a dataset will have a choice of licensing terms regarding the use of their data by others. The license terms will be displayed on the landing page of FRDR datasets and included in the metadata record.
Submitters will be required to choose a license. The following are the default options:
- Creative Commons Public Domain Dedication (CC0 1.0)
- Creative Commons Attribution 4.0 International (CC BY 4.0)
The following additional licenses may also be selected from the "Advanced" section:
- Creative Commons Attribution-ShareAlike 4.0 International (CC BY-SA 4.0)
- Creative Commons Attribution-NonCommercial 4.0 (CC BY-NC 4.0)
- Creative Commons Attribution-NonCommercial-ShareAlike 4.0 (CC BY-NC-SA 4.0)
- Creative Commons Attribution-NonCommercial-ShareAlike 4.0 (CC BY-NC-ND 4.0)
Note that a Curator may ask why you are unable to make use of the default licenses. For other licensing terms not found here, or for customized data use licenses, contact support@frdr-dfdr.ca.
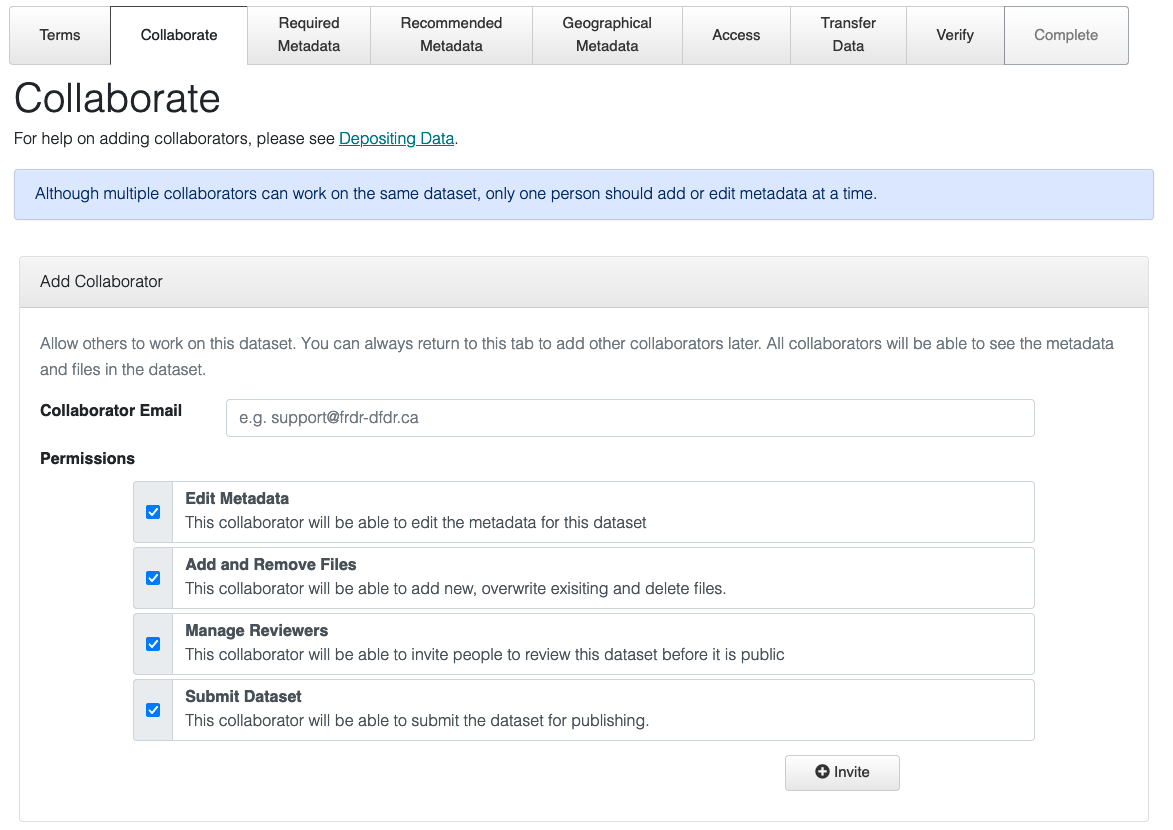
Add Collaborators
Adding collaborators is a great way for multiple people to enter metadata and upload files for a submission. You can only invite someone to contribute to a submission if they have logged into FRDR at least once. You will need the email address they used to register with FRDR, which they can find on their profile page.
To add a collaborator, start or resume a submission from the Data Publication Dashboard. Navigate to the Collaborate step, enter their email address, and click on the "Invite" button. They will receive an email notification with a link to accept your invitation.
By default they will be able to edit metadata and upload files. You can change their permissions by changing the check boxes below their email address.
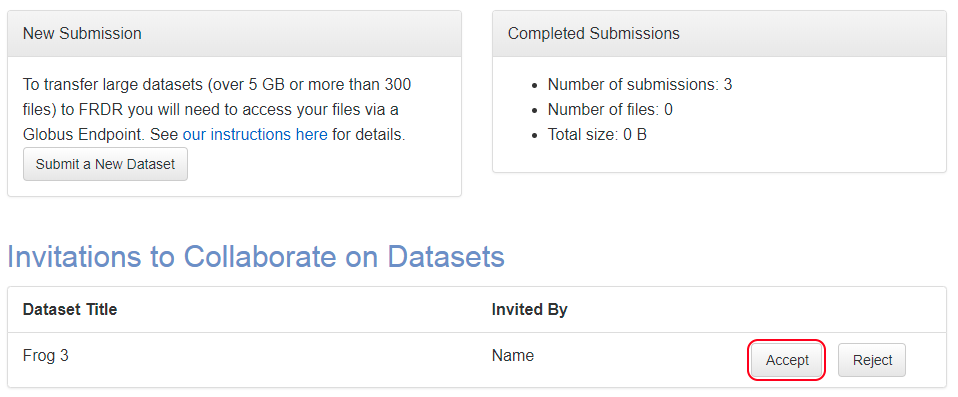
Collaborators can also accept your invitation from their own Data Publication Dashboard by logging in and clicking "Accept" next to the dataset title. You will receive an email when your invitation has been accepted or rejected.
After accepting the invitation, collaborators will be able to resume the submission from the Data Publication Dashboard and edit the submission. Although multiple collaborators can work on the same submission, only one person should add or edit metadata at a time. The last person to save will overwrite any metadata changes made by others.
You can invite additional collaborators or remove collaborators at any point during the submission process. To do so, click on the "Collaborate" button at the top of the page after resuming an in-progress submission. Please note that collaborators cannot invite additional people to collaborate, only the original submission creator can add and remove people via the Collaborate tab.
Entering metadata
Metadata, such as title, authors and their affiliations, keywords, dates, and description, are used to describe your dataset. Metadata helps others to discover and reuse the data. The more metadata that you provide, the easier it will be for someone else to discover and reuse the data.
A metadata submission form is provided to guide you through the process of entering metadata. Please refer to the section Describing your data for detailed information on how to fill out the contents of each field. While working in the submission form, you can view more information about each metadata field by hovering your mouse pointer over the label.
You can navigate forward and backwards through the metadata submission form by using the buttons at the bottom or top of the page. When you navigate to another screen within the metadata submission form, the metadata from your current page will be automatically saved.


Required fields are marked with an asterisk.
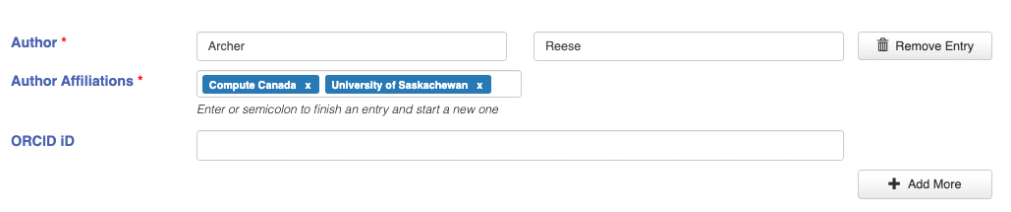
Some metadata fields are repeatable. For these fields, you can add additional entries by clicking “Add More” and remove entries by clicking “Remove Entry”.

Other fields will allow you to add multiple values within the field by entering a semicolon (;) or pressing the Enter key. For example, you can add multiple author affiliations for the same author:
External Dataset Review
All datasets submitted to FRDR undergo an internal review process called curation before they are approved for publication. Optionally, you may choose to share your dataset with an external reviewer, such as a journal editor or a colleague, before it is made publicly available.
To opt in for external review, on the “Access” tab of the submission interface, select “Yes” at the question "Will this dataset need a review period?" You will be required to add an "embargo date" and an "embargo reason", for example, “Dataset will be shared for external review”. The embargo will protect your data files from public access throughout the review process, but you may provide select access to your data by inviting reviewers.

Your dataset will be placed under embargo after the curation process is completed, at which time you can invite external reviewers to access your submission. External reviewers do not require accounts in FRDR. For information on how to invite reviewers, please see External Dataset Review documentation.
Specifying an embargo period
If a dataset needs to be protected for a period of time, perhaps due to restrictions from a publisher or funding agency, you can set an embargo and specify the date on which the data will automatically become accessible. During the embargo period, your data files will not be visible or available for download.
An embargo will always protect your data files from view and download, but you can choose whether the metadata that describes your dataset (title, authors, description, etc.) is publicly accessible or not. Under Advanced → Metadata Access, you can choose whether the metadata is:
- Searchable and Viewable: Your dataset will be discoverable in FRDR and other web search results. Your DOI will lead to your data landing page, and the metadata that describes your dataset will be visible. Your data files will not be visible or downloadable. This is the default option.
- Viewable with a link: Your dataset will not be discoverable in search results. Your data landing page and the metadata that describe your dataset can only be accessed by using the DOI or landing page URL. Your data files will not be visible or downloadable.
- Viewable only to me: Your dataset will not be discoverable in search results. Your data landing page and the metadata that describes your dataset are not public and can only be viewed by you and your collaborators when you log in to FRDR. Your data files will not be visible or downloadable.
Submitters will receive a notification one month before the embargo expires. This includes an option to request an extension. Failure to respond results in the automatic release of the embargoed dataset on the specified date.
FRDR allows embargoes of up to one year. All other embargo requests must be approved by FRDR’s service manager. Please contact support@frdr-dfdr.ca if you need to request an extended embargo.
Requesting Long-Term Preservation
In order to ensure all datasets submitted to FRDR are preserved where appropriate, FRDR has implemented an appraisal process to ensure long-term access is managed responsibly and sustainably. All datasets deposited with FRDR will be considered for long-term preservation.
As the depositor, you may participate in the appraisal process by answering the optional preservation question during the submission process: "Do you intend for this dataset to be preserved longer than 10 years?" (Y/N). You may also leave a comment describing, for example, your dataset’s potential ongoing social, scientific, or historical value.
If you are uncertain about the long-term value of your dataset, you may skip this question. Please be assured that your dataset will still be appraised for long-term preservation independently by the FRDR curation team in consultation with FRDR’s Preservation Coordinator. You are welcome to reach out to support@frdr-dfdr.ca if you have any questions about this process.
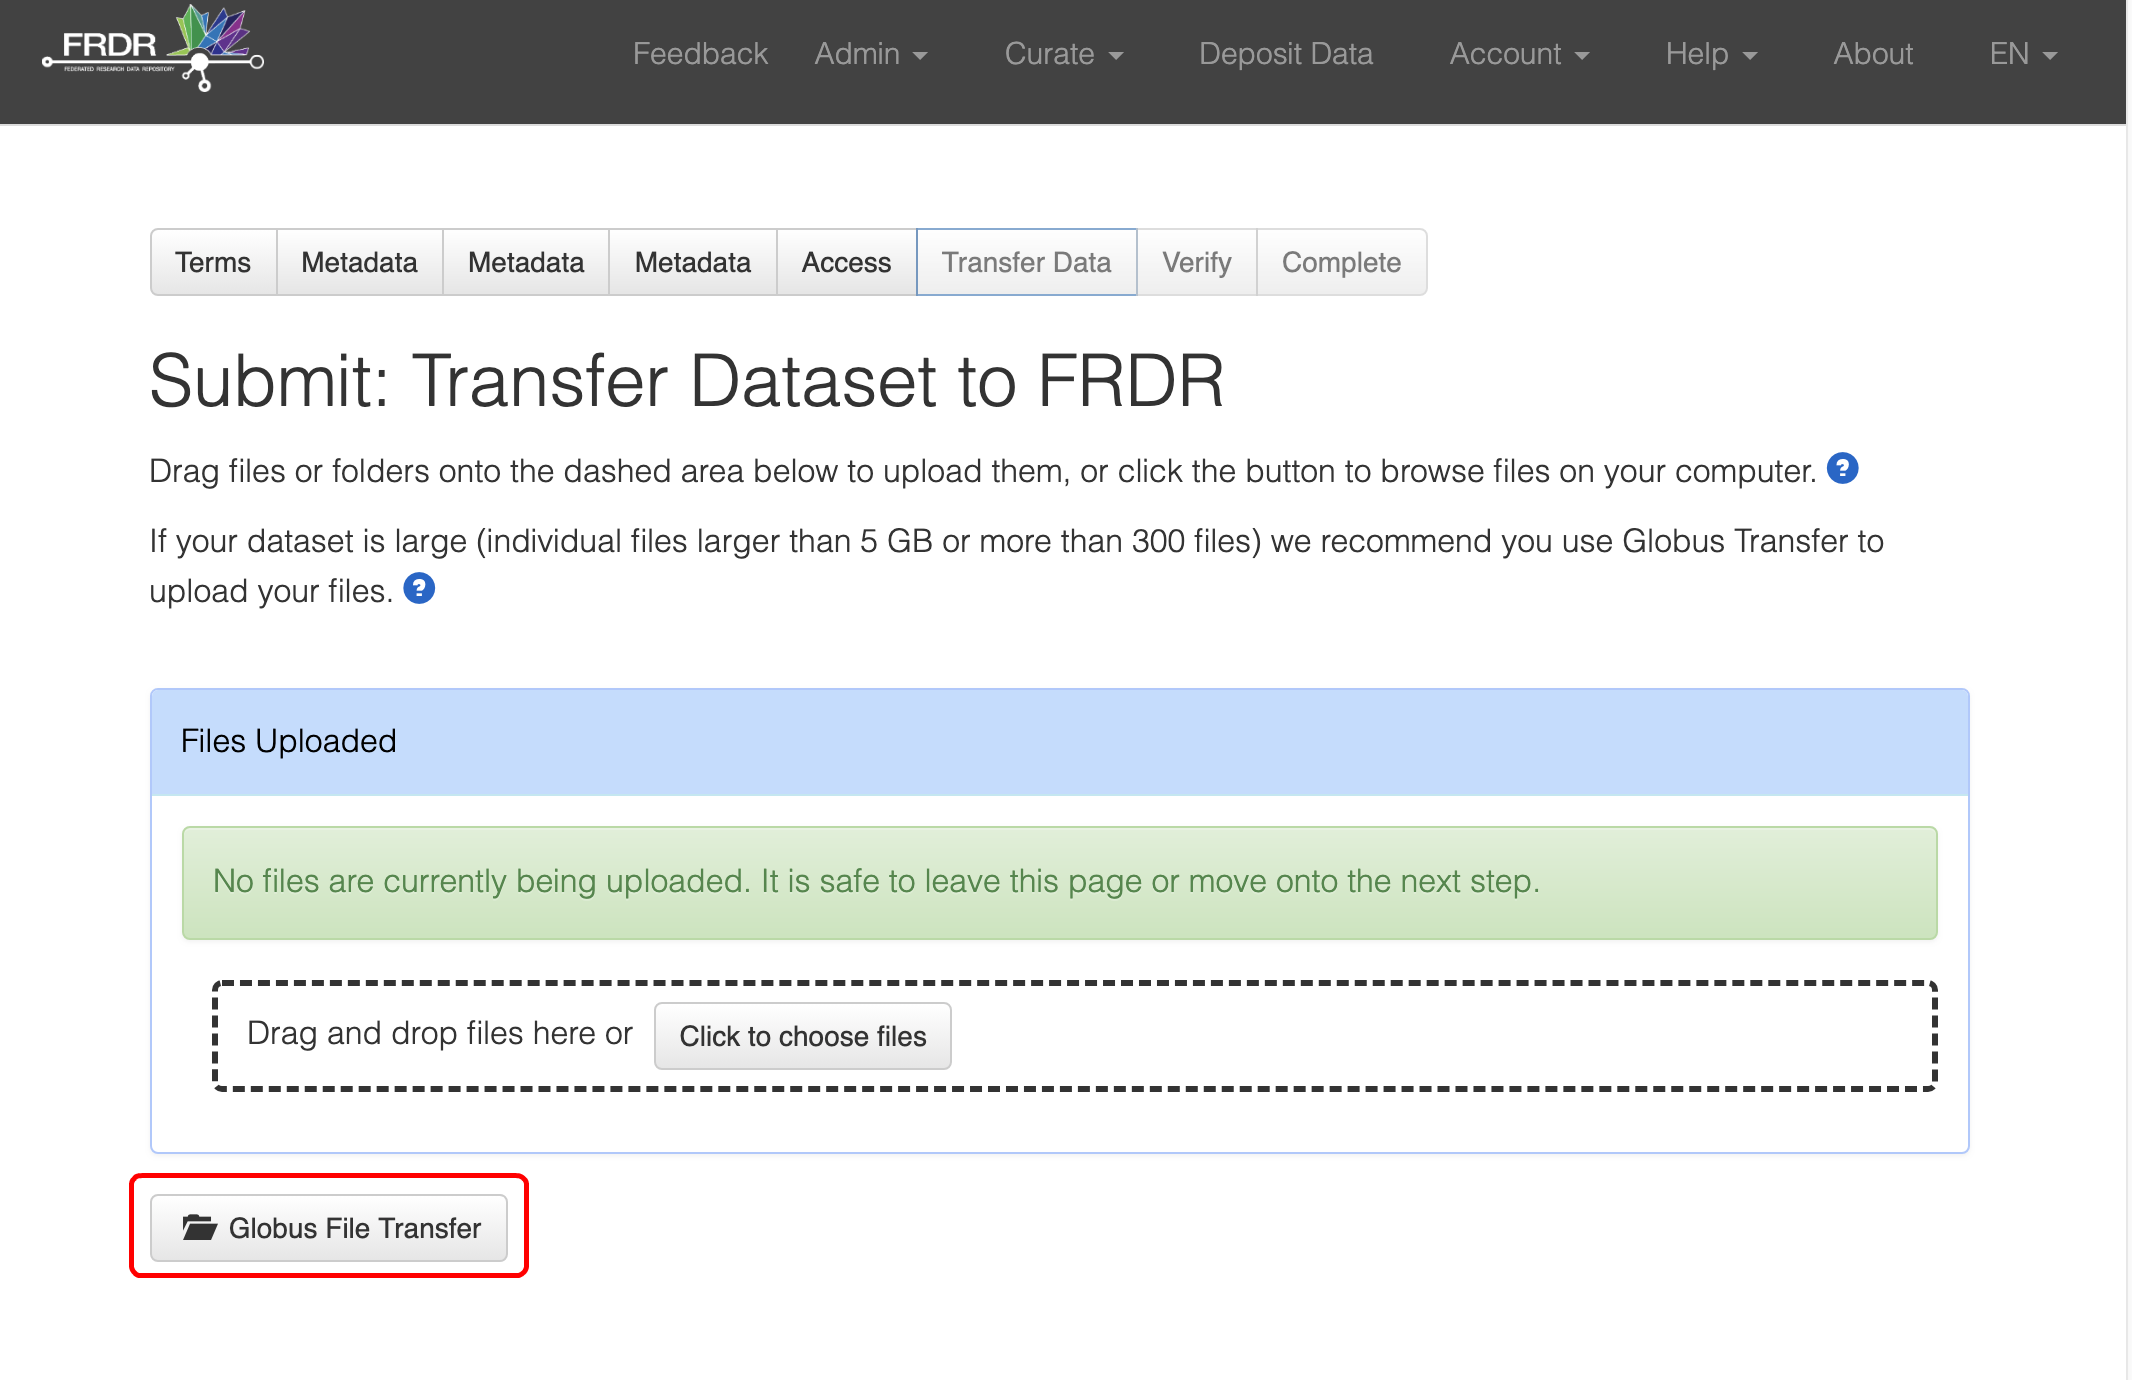
Transferring the dataset
Using Browser Upload (Small datasets)
This section covers the following activities:
- How to upload files using your web browser
- How to delete files
How to upload files using your web browser
Upload with File Browser
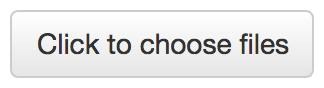
- Click on the button "Click to choose files" and use the file navigator to find the file you want to upload.
- Click on the open button to start uploading the file
- You can choose more than one file by clicking on the first file, holding the shift key and clicking on the last file you want to upload. If you need to upload several different files, skipping ones in between, hold the ctrl key on Windows or the command key on Mac and click on the files you wish to upload.
- There will first be a progress bar for the upload. This may be very fast if the file is small.
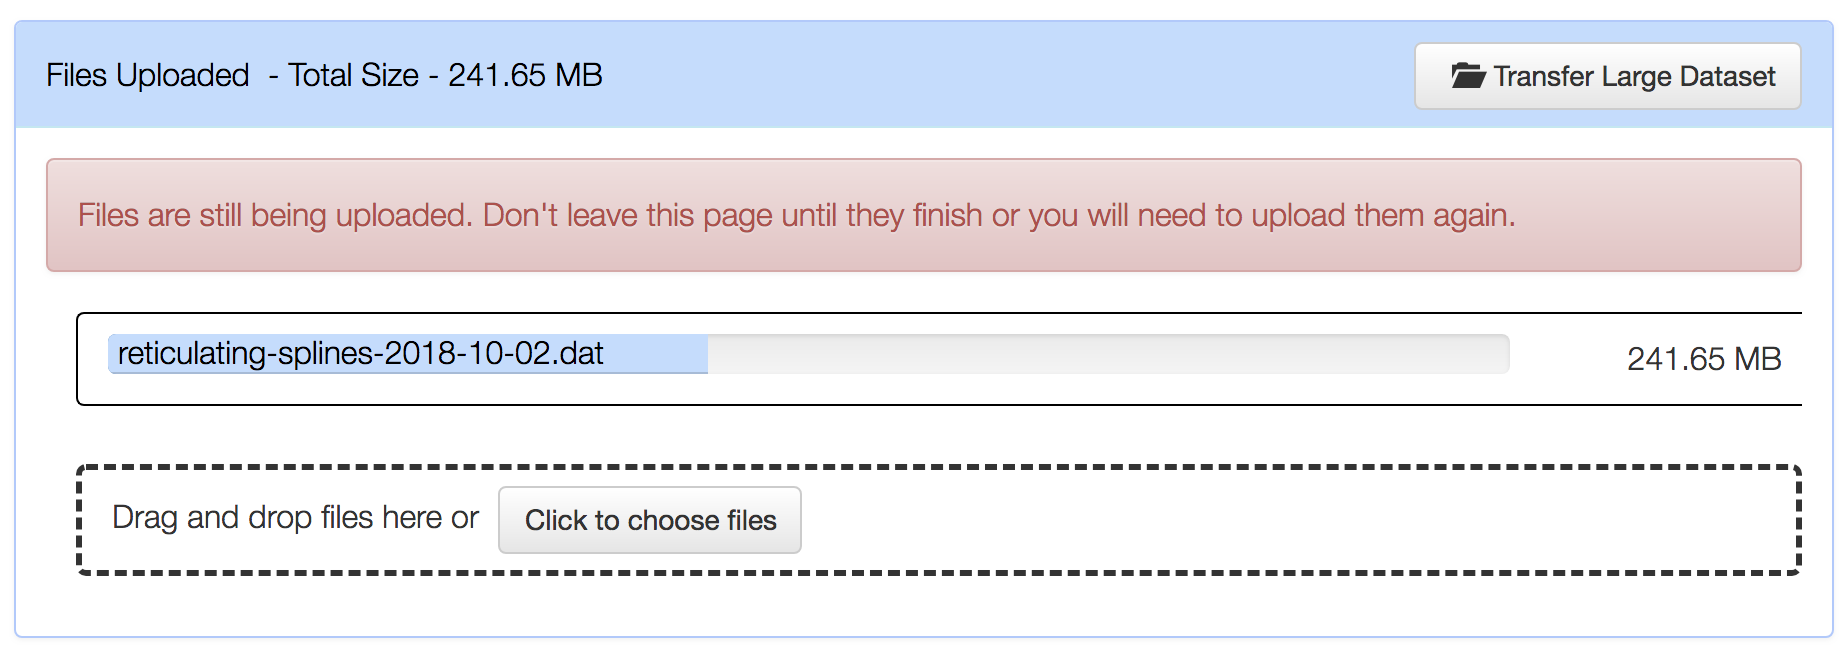
- Then there will be a spinning icon if the file has been uploaded successfully and the system is now processing the file.
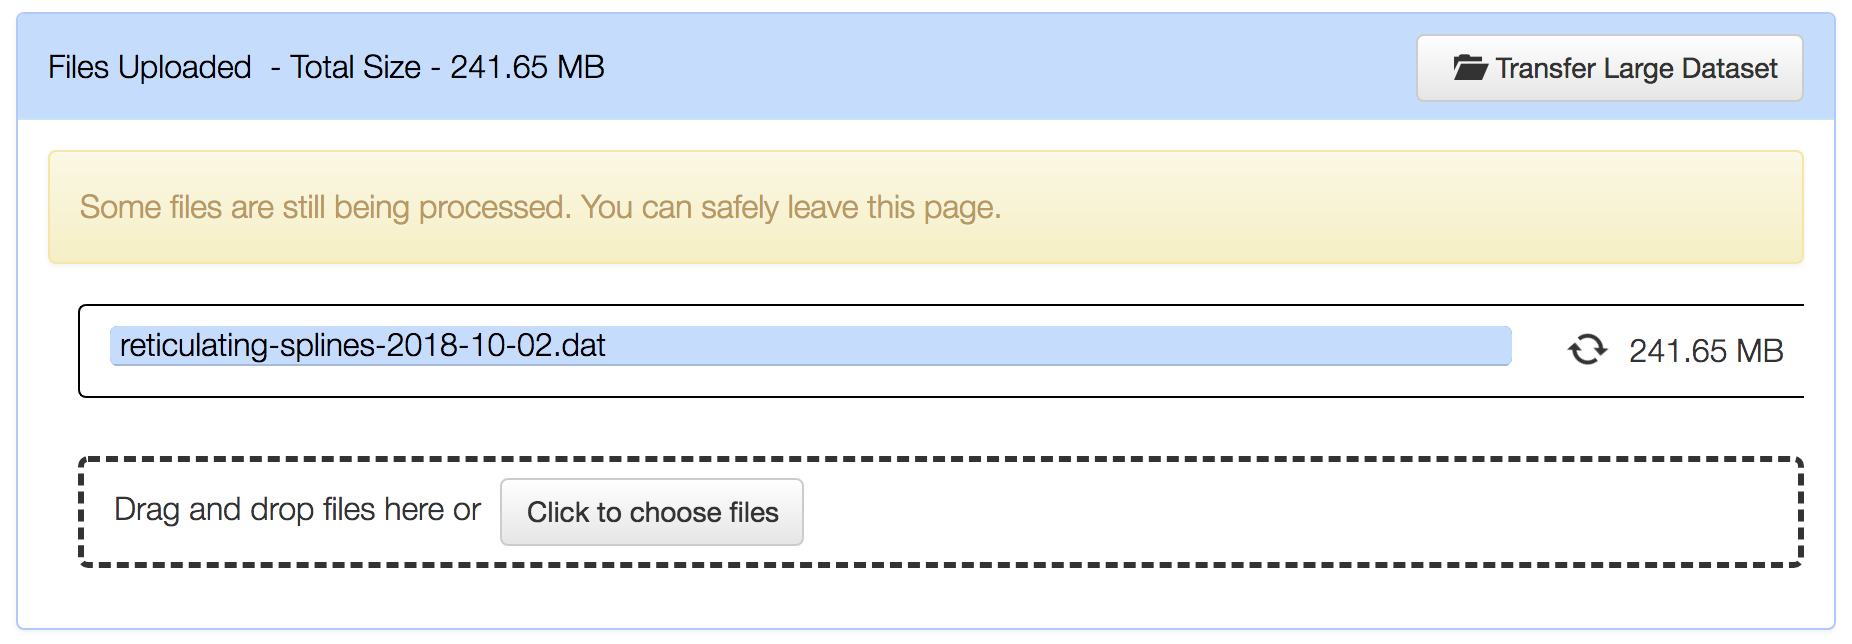
- The spinning icon will disappear and then a delete icon will be showing after the file name when the file has been completely uploaded.
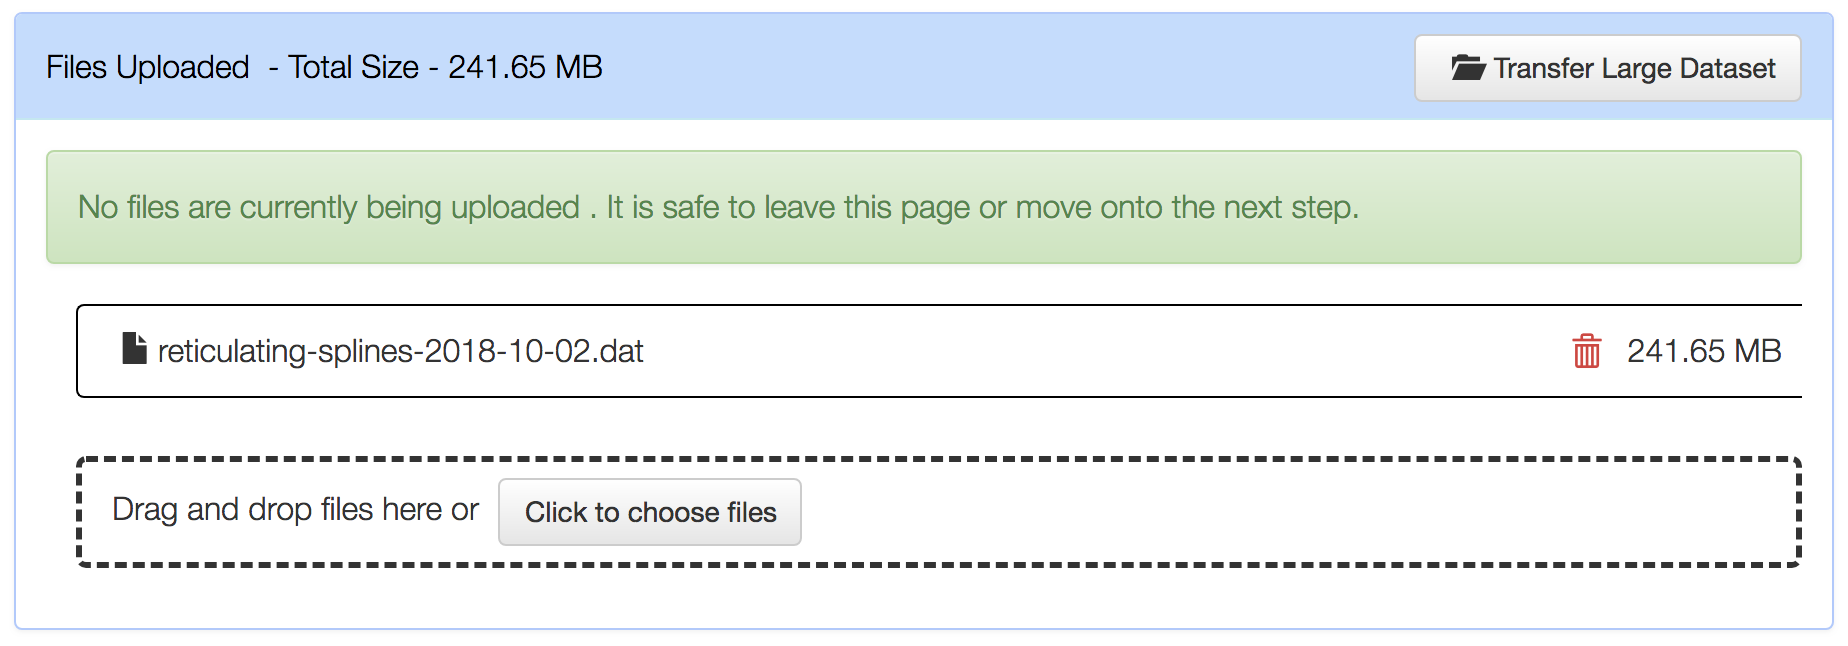
- If all files have been uploaded you will be able to move onto the next step.
Uploading folders or many files using drag and drop
- To upload a folder open your file navigator.
-
Find the files or folders that you wish to upload.
-
Drag them onto your web browser into the dotted area with the text "Drag and drop files here" to begin uploading them.

- There will first be a progress bar for the uploading of each file. This may be very fast if the file is small.
- Then there will be a spinning icon if the file has been uploaded successfully and the system is now processing the file.
- The spinning icon will disappear and then a delete icon will be showing after the file name when the file has been completely uploaded.
- If all files have been uploaded you will be able to move onto the next step.
Using Globus to Upload Dataset
This section covers the following activities:
- How to transfer files using Globus
- Check status of transfer
- Canceling an in-progress transfer
- Deleting a file that has already been transferred
If you have a very large dataset (greater than a few Gigabytes) or many files (several thousand files) we would recommend using Globus Connect to efficiently and reliably manage these larger datasets.
Note: If you are transferring from your notebook or desktop you will need to install Globus Connect Personal. Ensure that Globus Connect Personal is running so that you will have access to your data.
Globus moves files and directories between two endpoints: the source endpoint running at your end and FRDR, the destination endpoint.
- Choose your files and initiate the transfer
- After initiating the transfer, you can close the window and return to FRDR
- Globus will email you when the transfer is complete; very large datasets could take hours to transfer
How to transfer files using Globus
-
On the "Transfer Data" tab, click "Globus File Transfer" button to access the Globus file transfer page
-
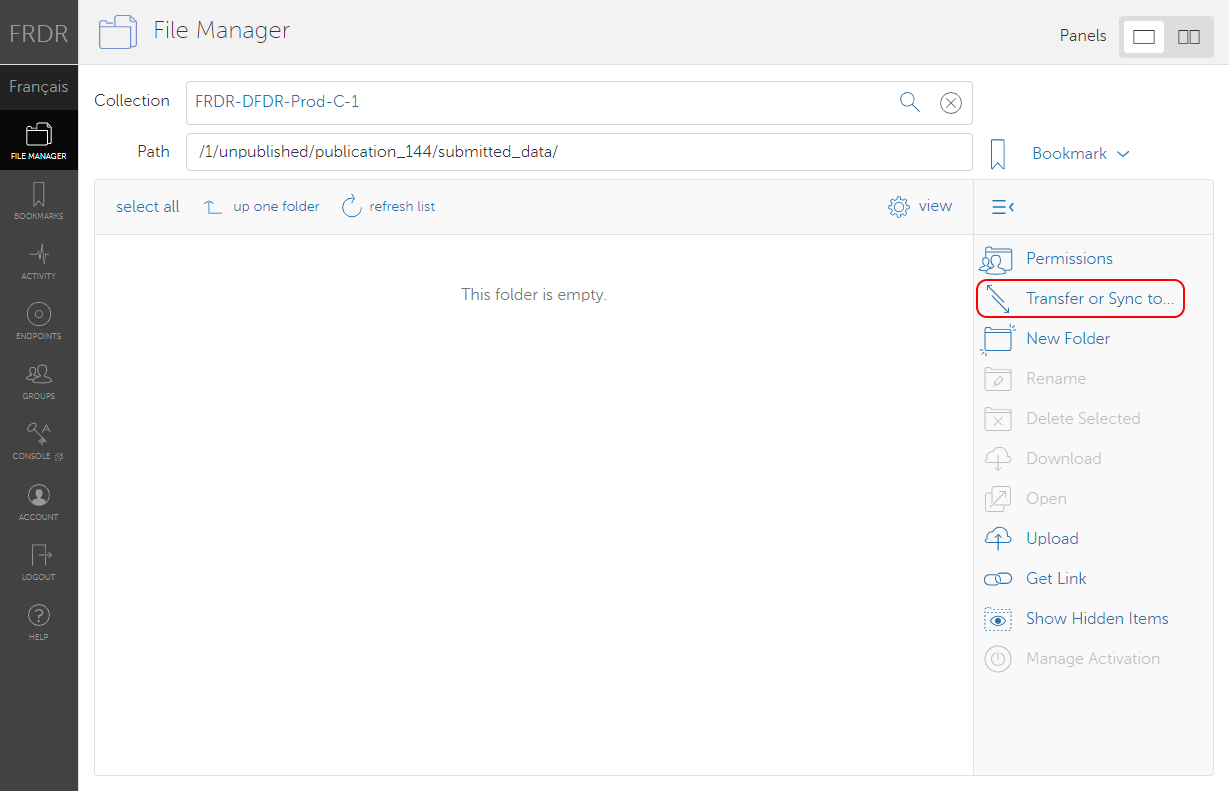
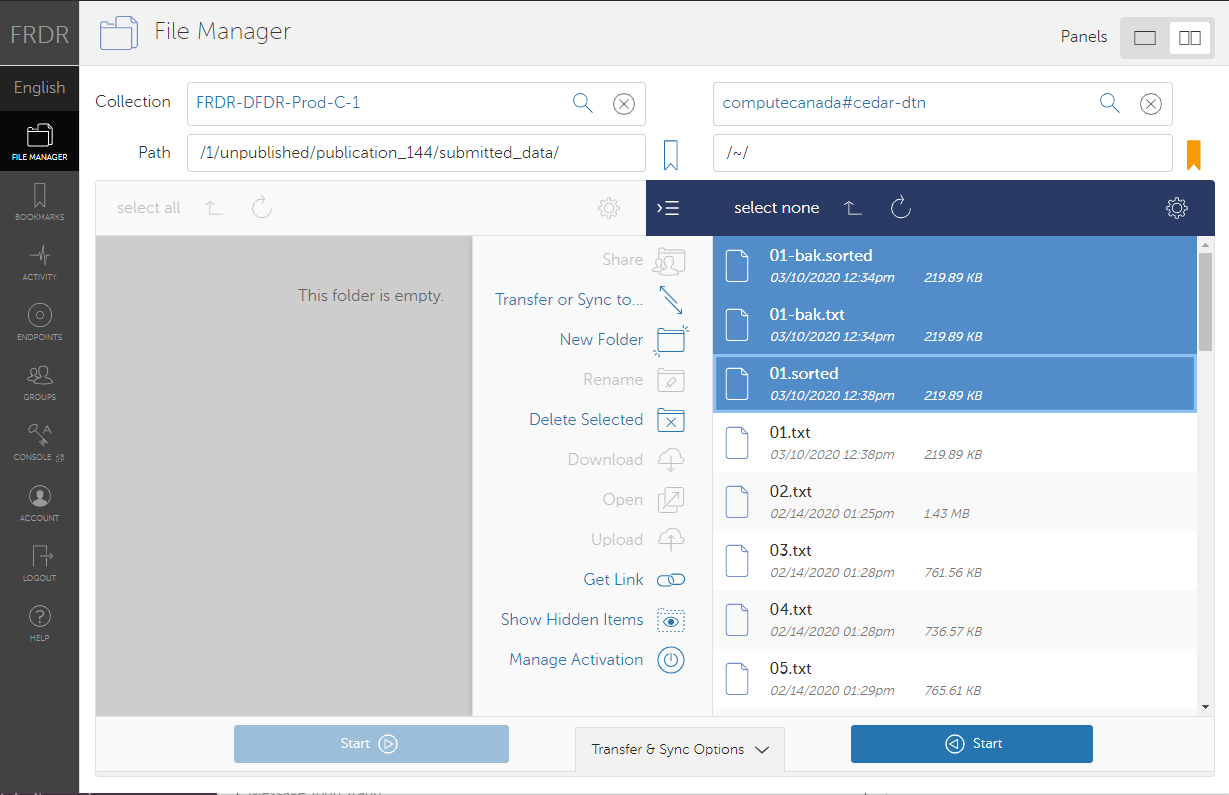
Click on the "Transfer or Sync to" link on the right side of the screen.
-
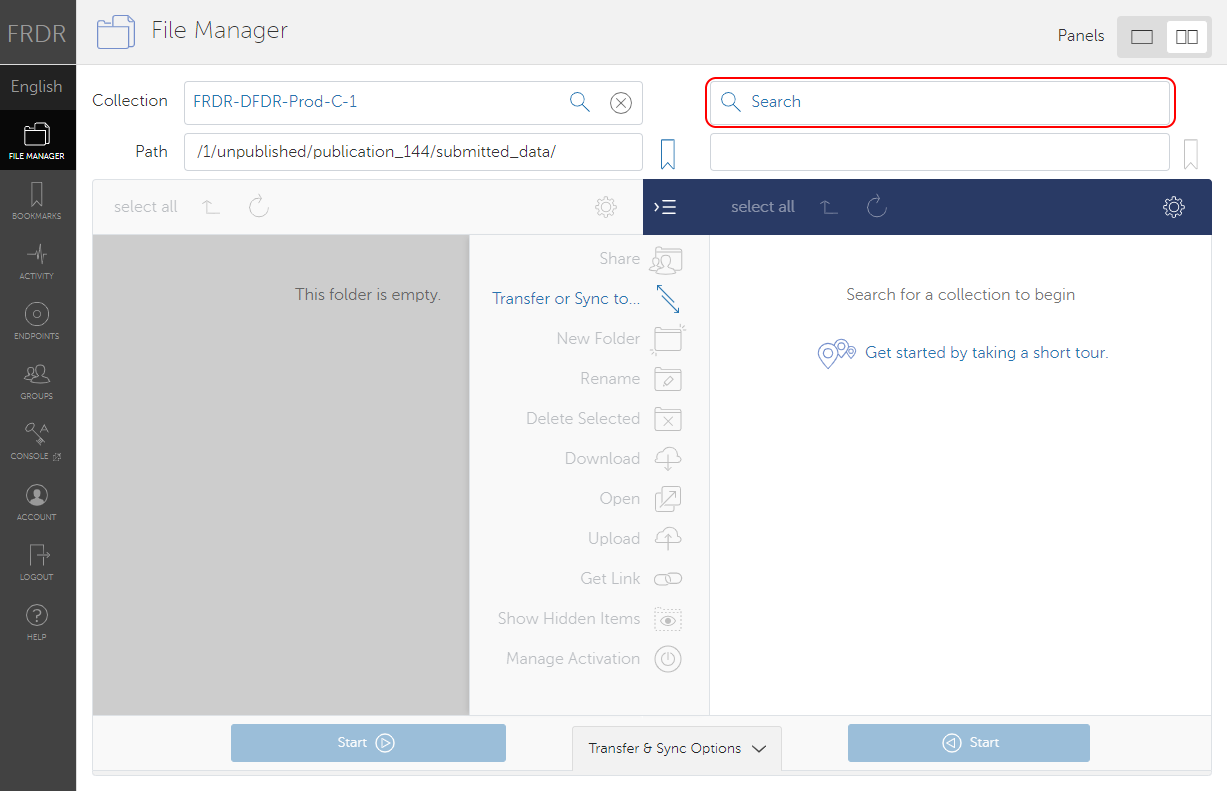
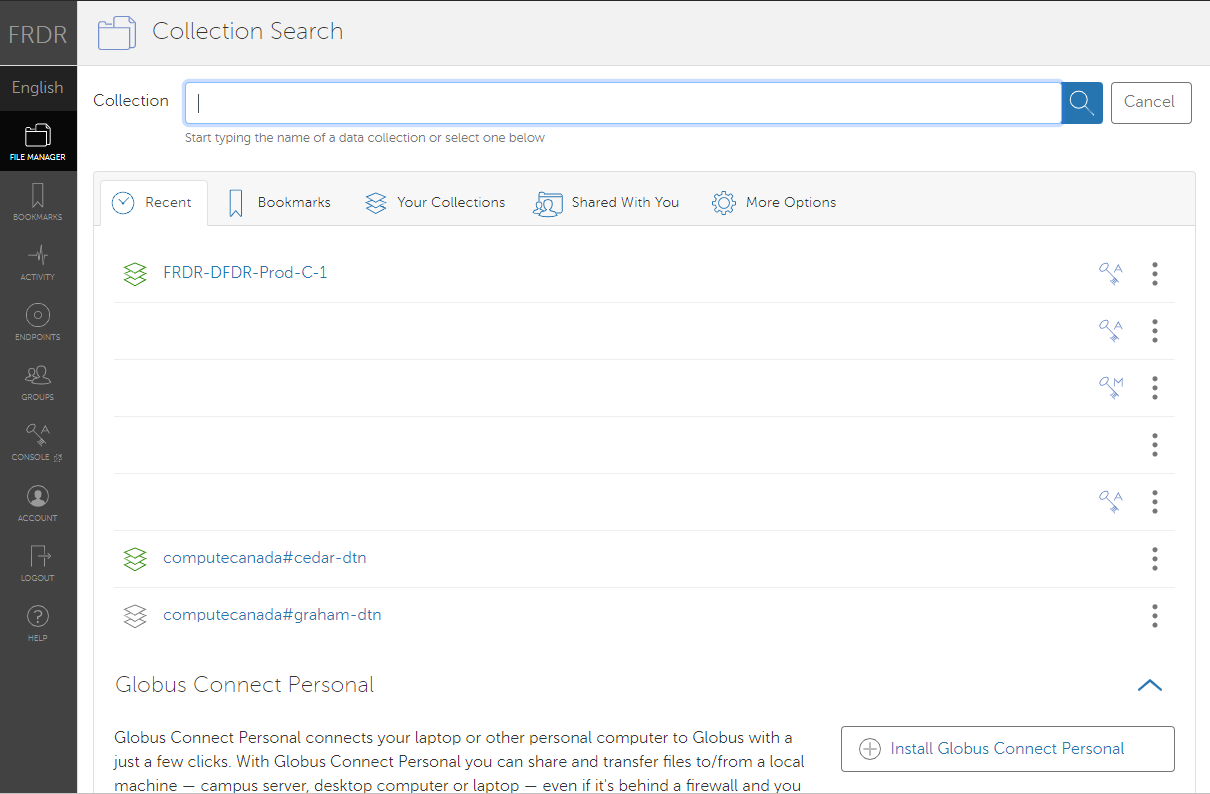
FRDR is on the left, we need to choose a source for files on the right. Click on the top right textbox by the magnifying glass to search for an endpoint to find files.
-
Start typing the name of the Globus endpoint containing your files. This could be the name you gave your notebook or desktop, a Compute Canada hosting site (e.g. Cedar, Graham, Niagra or Beluga) or another Globus endpoint location (e.g. a lab or institutional server)
-
Find and select the files necessary for your dataset. You can Shift-click or Ctrl-click to build your selection of files.
-
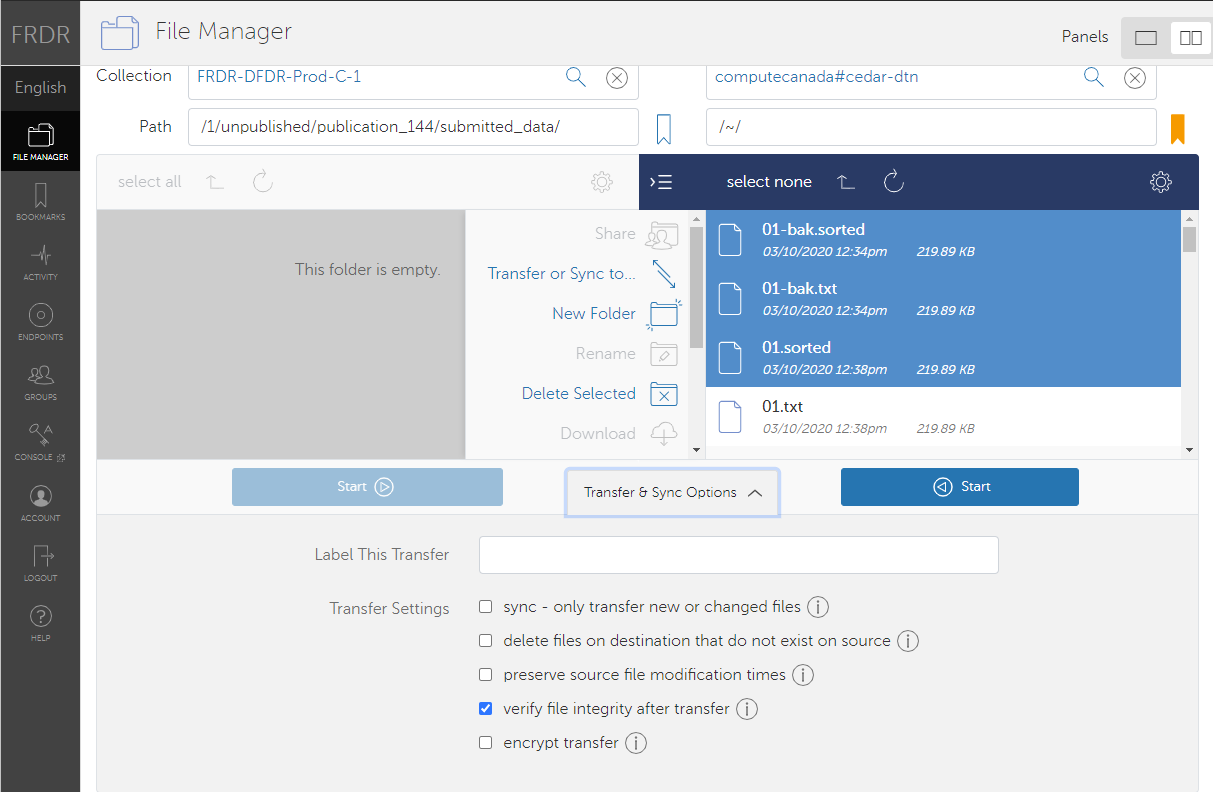
Click on the Transfer and Sync Options button at the bottom middle of the screen.

-
Label this Transfer: enter a name for the transfer activity that will make it easy to identify.
-
Select Transfer Settings: provides various options to control file checking and security. In many cases, the default settings will be appropriate. Contact support@frdr-dfdr.ca if you require assistance understanding which additional transfer settings may be needed for your dataset.
-
Initiate the transfer by clicking on the blue start button at the bottom of the page. You can initiate as many transfers as needed during a single session. This may be required if, for example, you want to transfer files that live in different folders or source endpoints.

-
The status of the transfer will be indicated on the left hand side under activity, but the transfer will proceed independently and you can close that window and return to FRDR to verify and complete your submission.

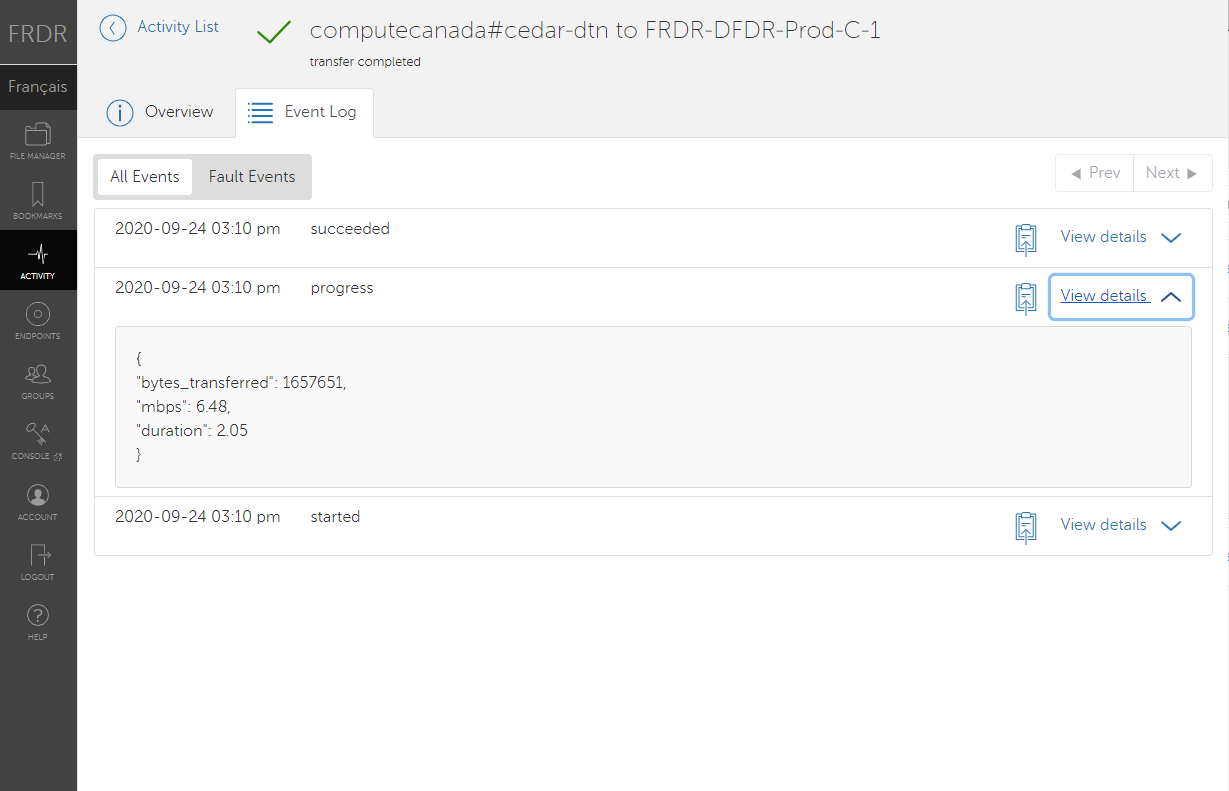
Check status of transfer
- Go to the Activity page.
- Click on the transfer in the list (its title will be the label if you gave it one).
- This page will give you the current status of the transfer (i.e., the number of files transferred, how much data has been transferred, or whether an error has occurred ).
- For a timeline click on the "Event Log" tab.
Canceling an in-progress transfer
- Go to the Activity page.
- In the list of transfers, find the correct transfer based on the label
- Click on the X button
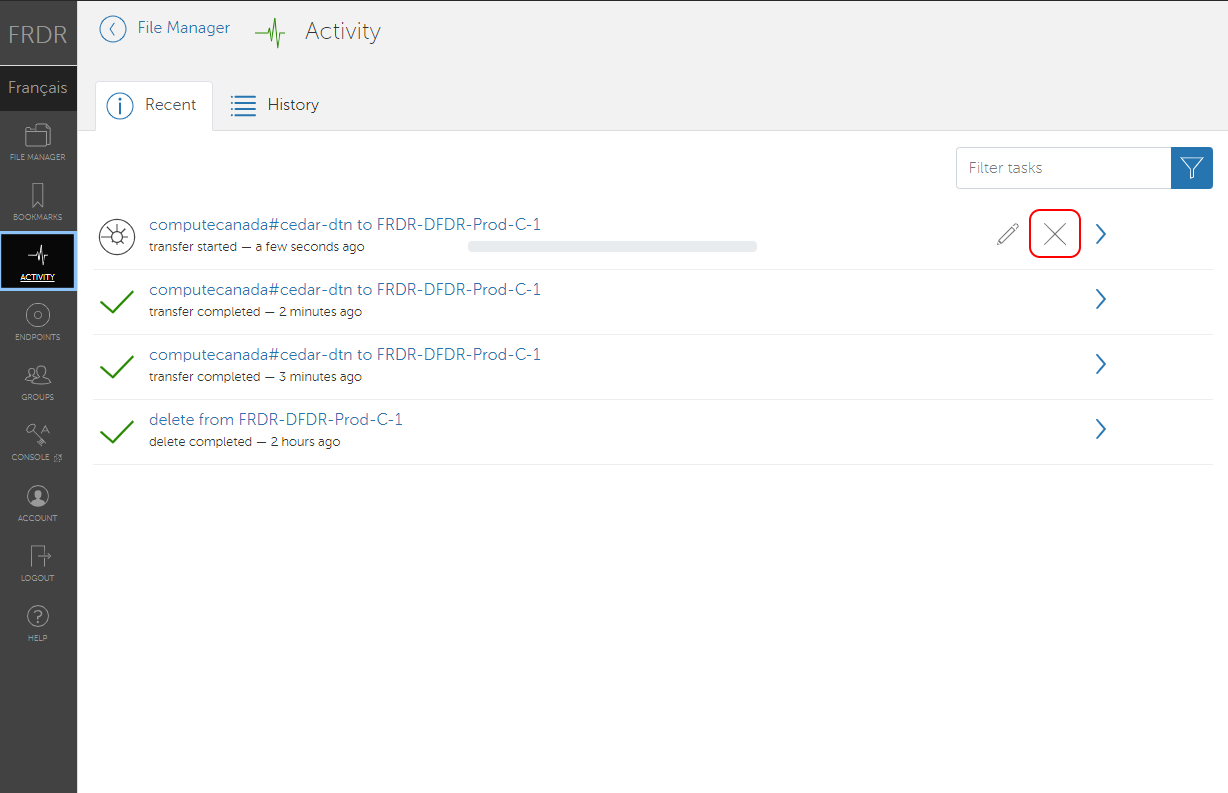
- Click on the red terminate transfer button.
Deleting a file that has already been transferred
- Navigate to the dataset submission, located in the "In Progress" tab of the Data Publication Dashboard. Click "Resume" to get into the submission.
- Click on the "Transfer Data" tab (if not already on it.)
- Click the "Transfer Dataset" button to open the transfer window.
- Locate the file or directory that you want to delete. Click once on the file or directory to highlight it.
- Click the “Delete Selected” button on the right hand side of the screen (or middle if both the source and destination are open) and confirm it by clicking on the delete button on the resulting screen.
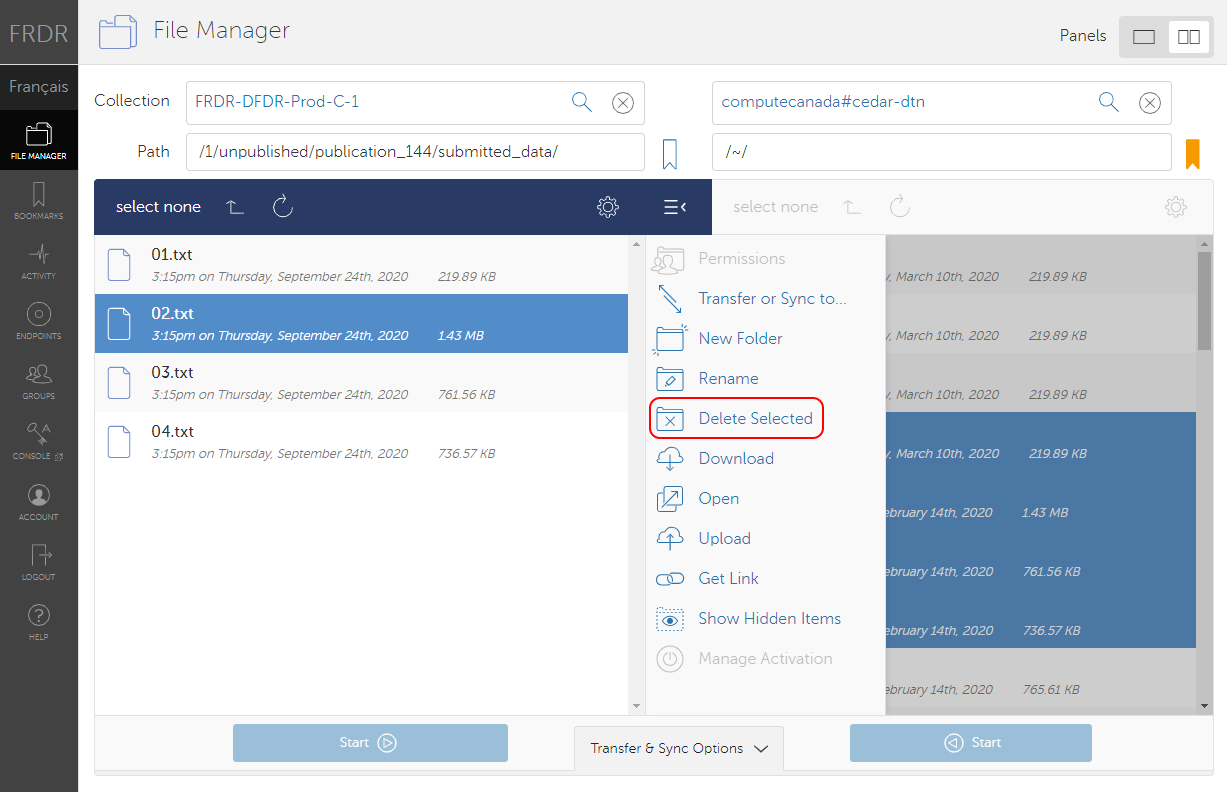
- Repeat as needed until all of the files or folders have been deleted.
Submitting a dataset is not an instantaneous process. Several of the steps can take a significant amount of time:
- Transferring a really large dataset might take hours or longer;
- A curator will be assigned to review and decide whether to approve your submission;
- After approval, it will take up to 24 hours for the submission to be indexed and discoverable in FRDR's Search.
If possible, it is a good idea to retain a copy of your data after submitting. While FRDR does automatically create backups for all datasets, this process may take up to 24 hours to complete.
Finalizing the Submission
After the data transfer is complete, you have an opportunity to review the metadata and list of files before submitting the dataset for publication. Return to any of the previous tabs if you want to make changes to the metadata or data files. Once you finalize the submission, changes to metadata and files can only be done by a curator.
To submit the dataset, click the “Finish” button. Your submission will be reviewed by a curator before it is published in FRDR. Once a curator has finished reviewing your submission, you will be notified by email and the status will update to ‘Complete’ in your Publication Dashboard.
We recommend that any publication or reference to your dataset includes the DOI.
DOIs
DOIs are reserved at the beginning of the submission process. You may share your DOI with journal publishers or research offices at any point; however, the DOI will not be a registered, active link until your dataset is reviewed by FRDR curators and approved for publication.